Company Data Exchange AE100
Central Mapping (Synchronization) #

Overview #
This extension simplifies data synchronization between multiple companies. It allows creating templates and assigning companies to templates. The template describes what fields of which tables should be synchronized. It also allows to filter the records and specify the actions to be executed when copying records.
The main page of this extension is Central Mapping Template List. The Copy action on this page copies all the data according to the selected template into the companies specified in the template. Only the data more recent than Last Copy Datetime will be copied into any given company.
Report Copy Data via Central Mapping (80024) can be used to run the Copy action for all central mapping templates.
Adding new company to template #
Local company #
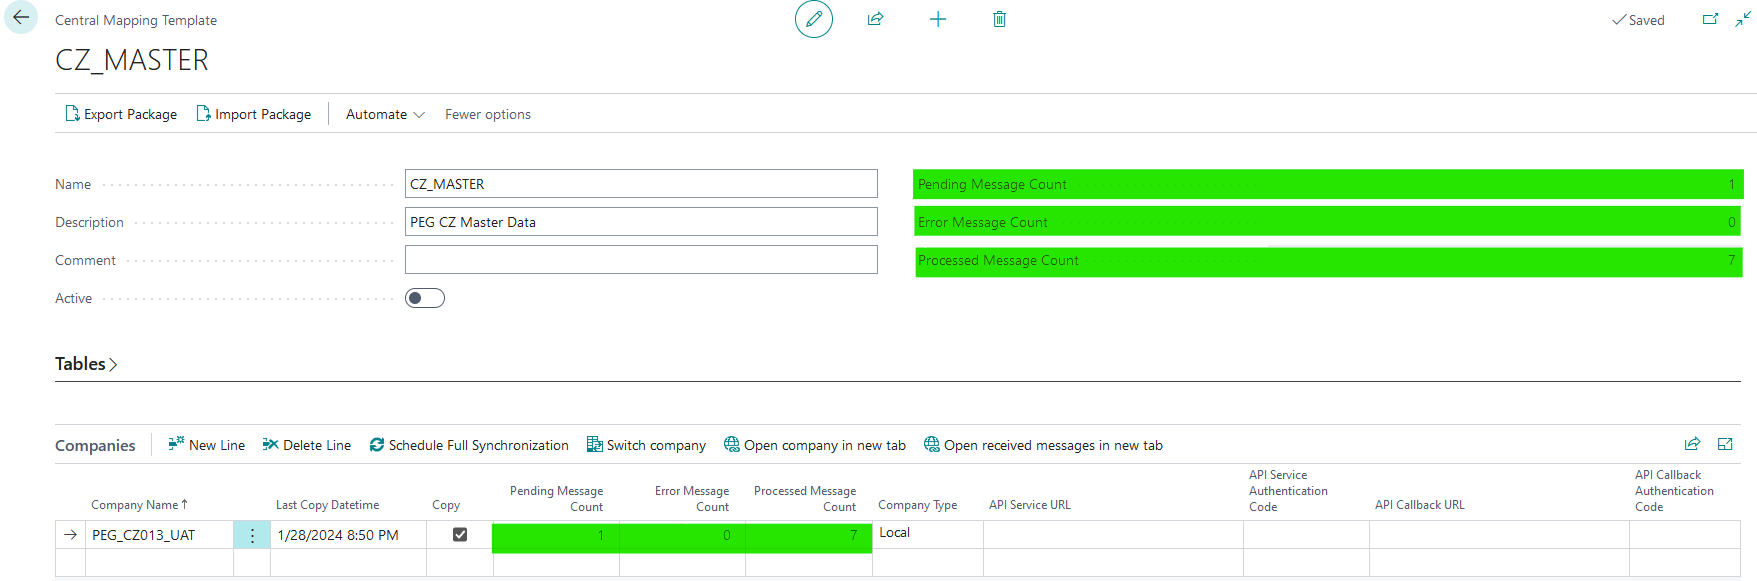
Go to "Central Mapping Template List" and open the template where you want to add the company. If the template is active, deactivate it.
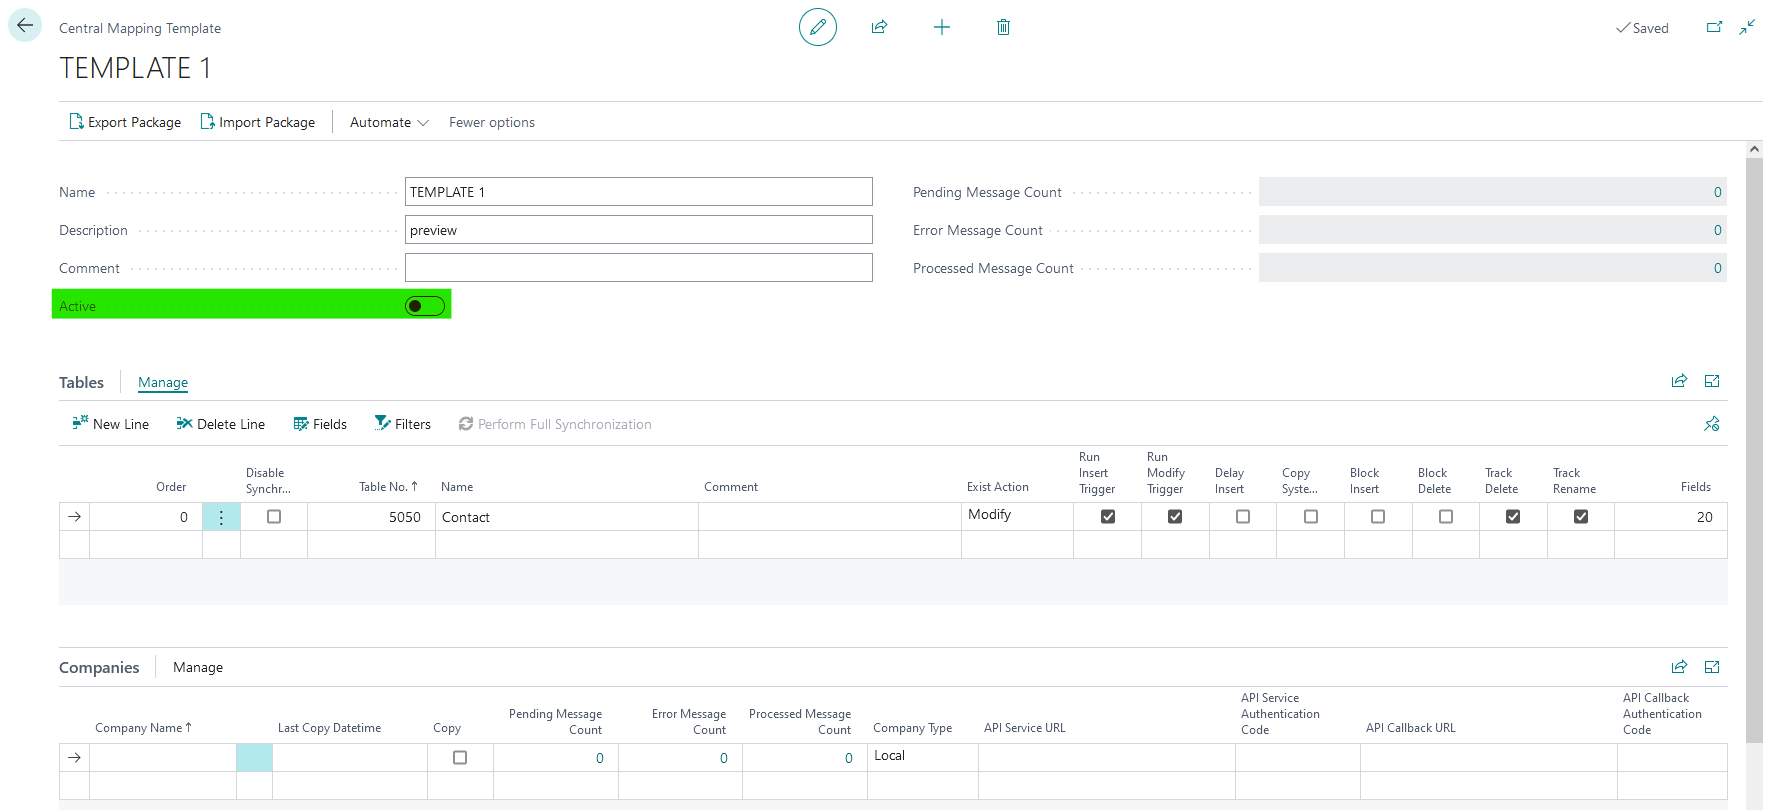
In Companies section, add a new line and specify the target company name. If data should be synchronized to this company, enable Copy and then you can activate the template.
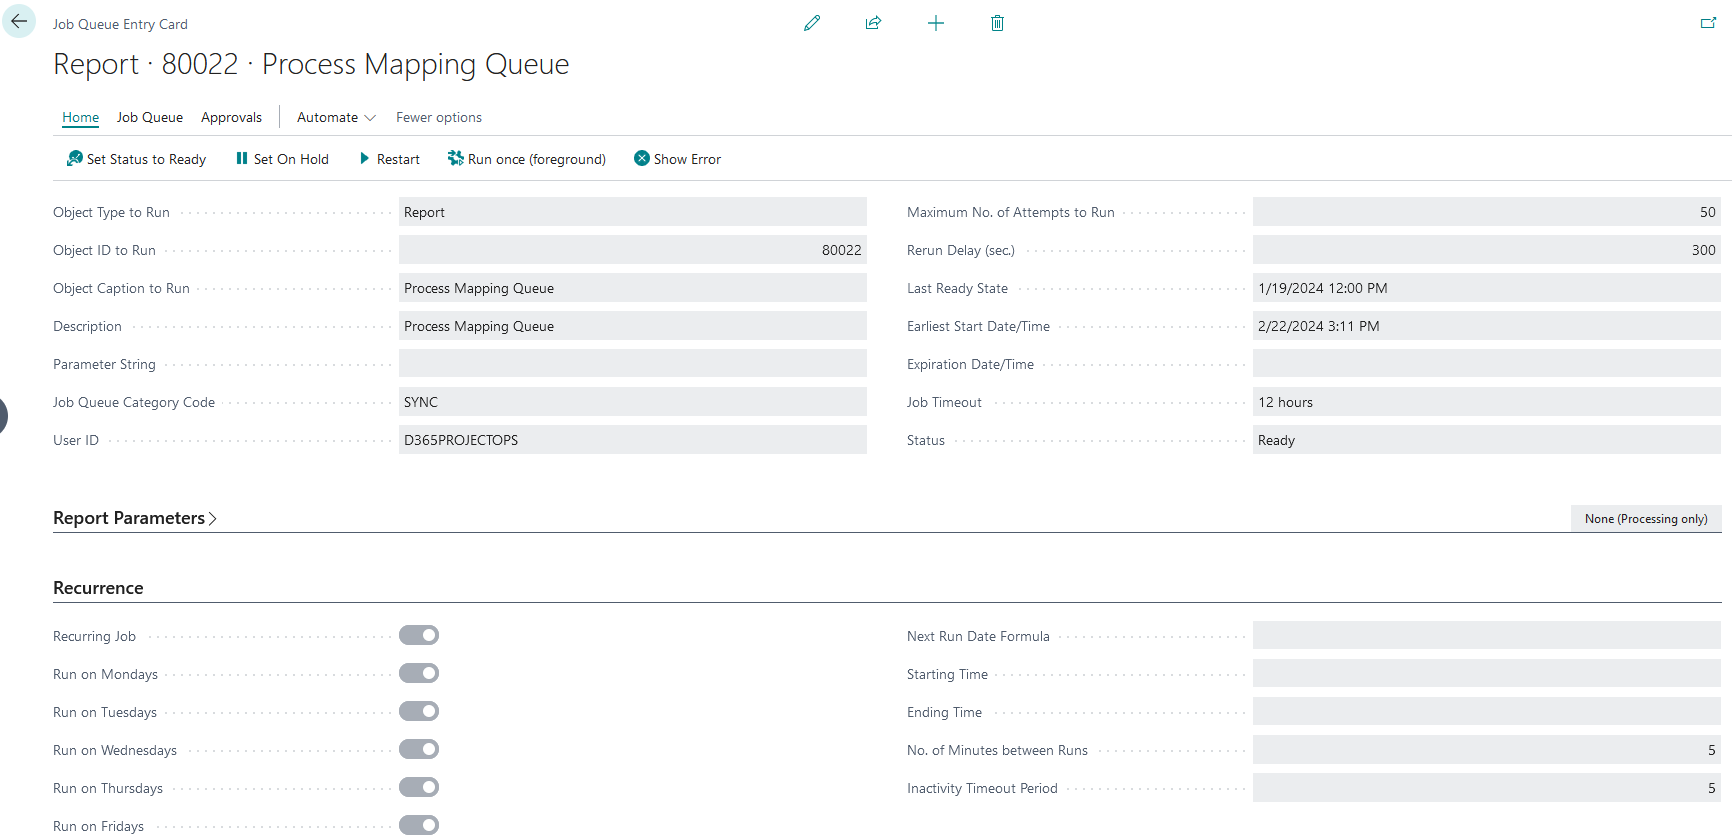
If the received messages should be automatically processed, you need to create a recurring job queue entry for report 80022 in the target company.
External company #
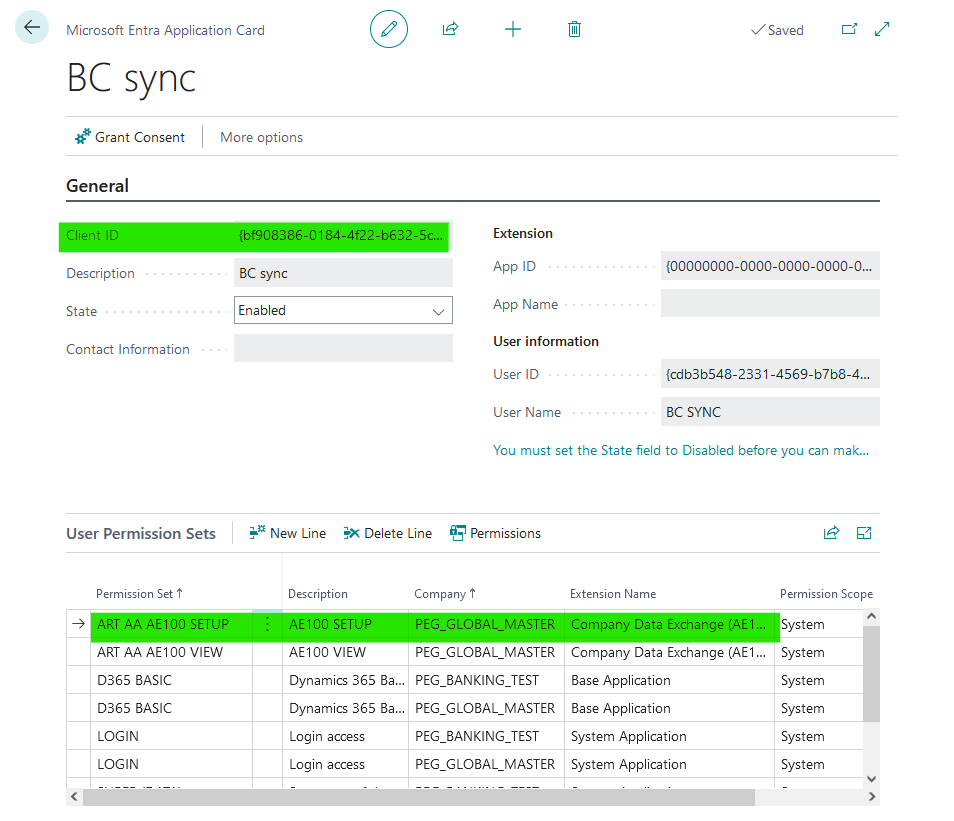
Check "Microsoft Entra Applications" and make sure the API user has AE100 SETUP permission set assigned for the source company. Do the same in the target environment for the target company.
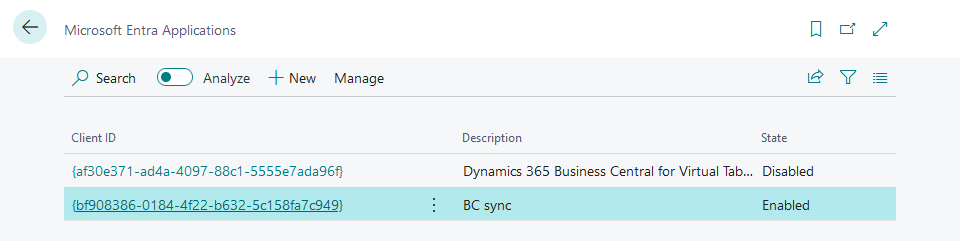
Check "REST Authentication Configurations" if there is a OAuth 2.0 type authentication with the same ClientID as specified previously, and if needed create one. Do the same in the target environment for the target company.

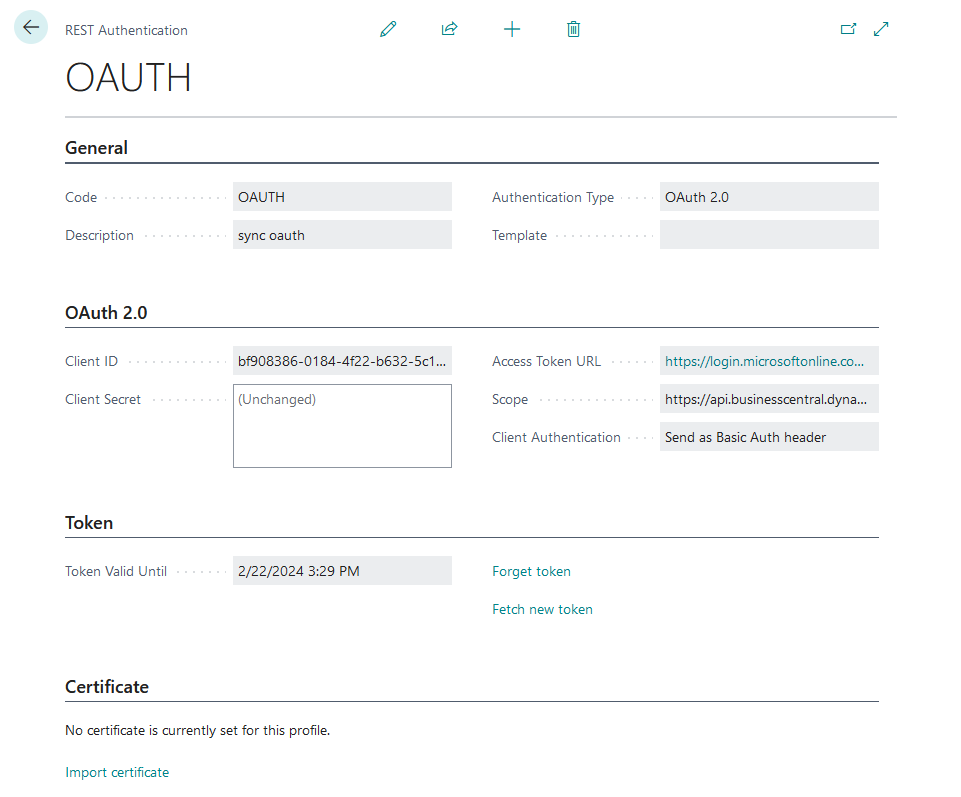
It is needed to know the Client Secret to finish this setup. In this case, the following values are to be used:
| Client ID | <|
| Client Secret | |
| Access Token URL | https://login.microsoftonline.com/<tenantID>/oauth2/v2.0/token |
| Scope | https://api.businesscentral.dynamics.com/.default |
If the received messages should be automatically processed, you need to create a recurring job queue entry for report 80022 in the target company.
Then go to "Central Mapping Template List" and open the template where you want to add the company. If the template is active, deactivate it.
In Companies section, add a new line and specify the target company name. Then set Company Type to "Remote", specify the target environment API base URL in API Service URL and enter the previous created target REST Authentication to API Service Authentication Code. Likewise specify the current environment API base URL in API Callback URL and local REST Authentication in API Callback Authentication Code.

If data should be synchronized to this company, enable Copy and then you can activate the template.
Adding new table to template #
After deactivating the template, add a new line in Tables section and specify Order and Table No.
Order allows to specify in which order should the tables be processed with the lowest Order being processed first. This is used to resolve data dependencies so that independent tables can be synchronized first and dependent later.
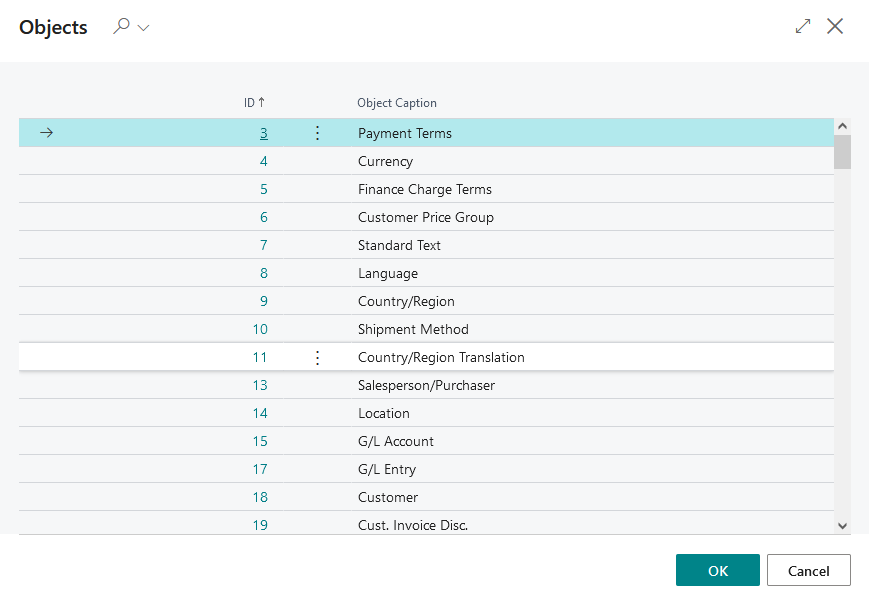
Instead of manually typing the Table No. it can be selected from the list.
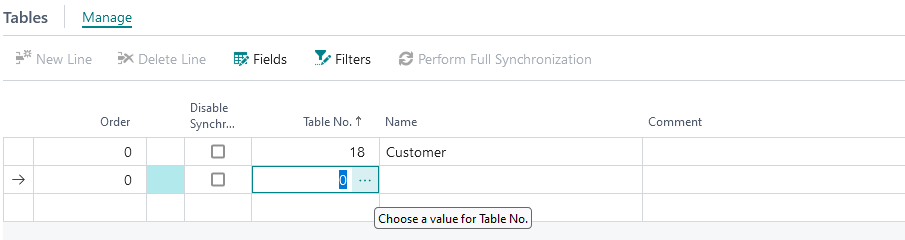
Notice: One template cannot contain multiple lines with same Table No.
Adding fields #
To specify the fields which should be synchronized from the table, use Fields action to open the list of fields.

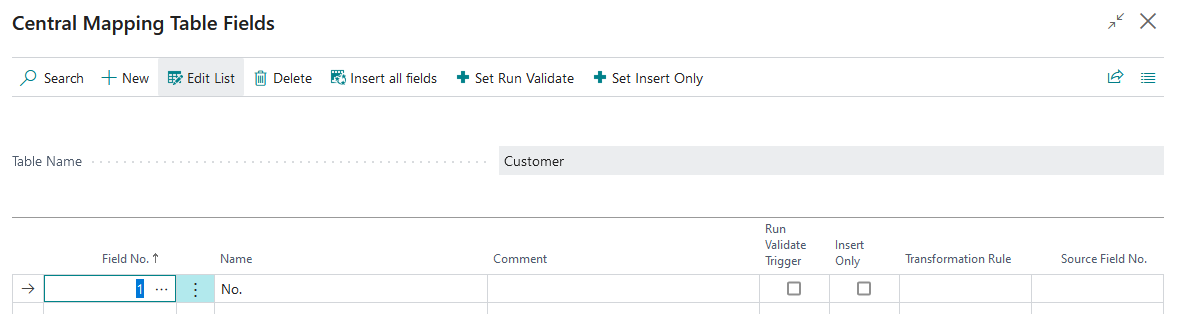
Fields can be added manually or using Insert all fields action. Only normal fields can be added.
Checkbox Run Validate Trigger specifies if internal validation of value should be performed when synchronizing the field. In most cases this field should be checked, as it often tests whether related records exist in target company. For example, if Run Validate Trigger is enabled for field Currency Code in Customer table, the synchronization will fail if the specified currency does not exist.
If Insert Only is enabled, the value of the synchronized field is used in the target company if the synchronized record does not exist in target company and the users will be able to manually overwrite the value in target company. Otherwise, the value from current company will overwrite the value in target company during each synchronization and users won’t be able to manually overwrite it. Action Set Insert Only enables this for all (currently selected) lines.
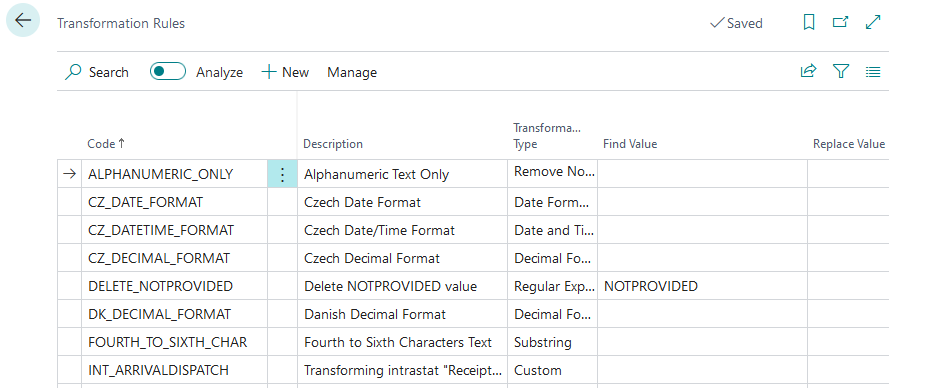
Transformation Rule specifies the transformation that will be applied to field value before synchronization. New transformation rules can be created on the "Transformation Rules" page.
Source Field No. allows to synchronize data from a different field. If this field is specified, then the field specified in Field No. no longer needs exist in the current environment. This is useful for synchronization between companies which use different localization extensions.
Setting filters #
Action Filters can be used to limit which records should be synchronized.
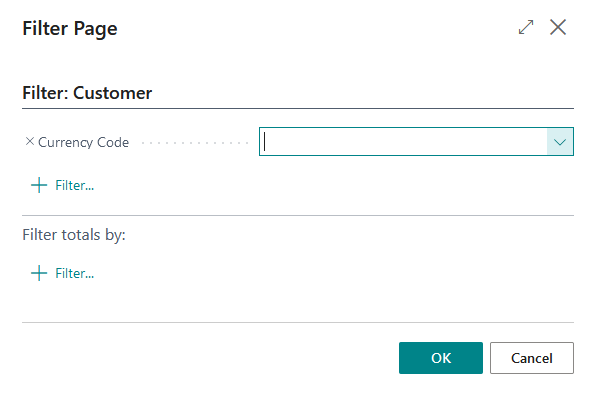
If no filters are specified, all records are synchronized.
Synchronization options #
There are multiple fields which modify how the table is synchronized.

Disable Synchronization excludes the table from the usual synchronization, but not from the Perform Full Synchronization action. It will also not stop the logging of deletes and renames if Track Delete or Track Rename is active.
Exist Action has two possible values: "Skip" which does not synchronize the records that already exists in the target company, and "Modify" which modifies them. Basically, an equivalent of Insert Only for the whole table.
Run Insert Trigger and Run Modify Trigger specify whether a trigger should run after the record is inserted or modified in the target company. In most cases this should be enabled, but sometimes an error may occur during the trigger. If the error is caused by missing data, the required table should be synchronized with lower Order than the current table, but in other cases disabling the Run Insert Trigger/Run Modify Trigger may be the solution.
Delay Insert means the new record in target company is first inserted with just the key values specified, and then is modified after filling the rest of the values. In some cases, the validate trigger on some fields expects the record to already be present in the database. In those cases, you might need to either disable Run Validate Trigger on the field which causes the issue or enable Delay Insert.
Copy SystemId specifies whether the original value of SystemId field should be transferred when inserting a new record in the target company during the synchronization. This may have an effect on connections to external services which access the records based on their SystemId.
Block Insert and Block Delete specify whether creating new records and deleting existing ones is blocked in the target company.
If Track Delete or Track Rename is enabled, the respective action is tracked in a log (Table 80089) and synchronized to target companies. The tracking is only applied on the records which match the Filters. If Track Rename is disabled for a given table in any template, the renaming of records for this table will be disabled.
If the Table No. specified in the first step already exists in a different template, user gets error if Track Delete or Track Rename values do not match the values in the existing line.

The same error is returned if Block Insert or Block Delete in current line does not match the value in the existing line and the current template contains the same companies as the other template.
In case the error could not be shown immediately after adding new line, it will be shown when leaving the page.
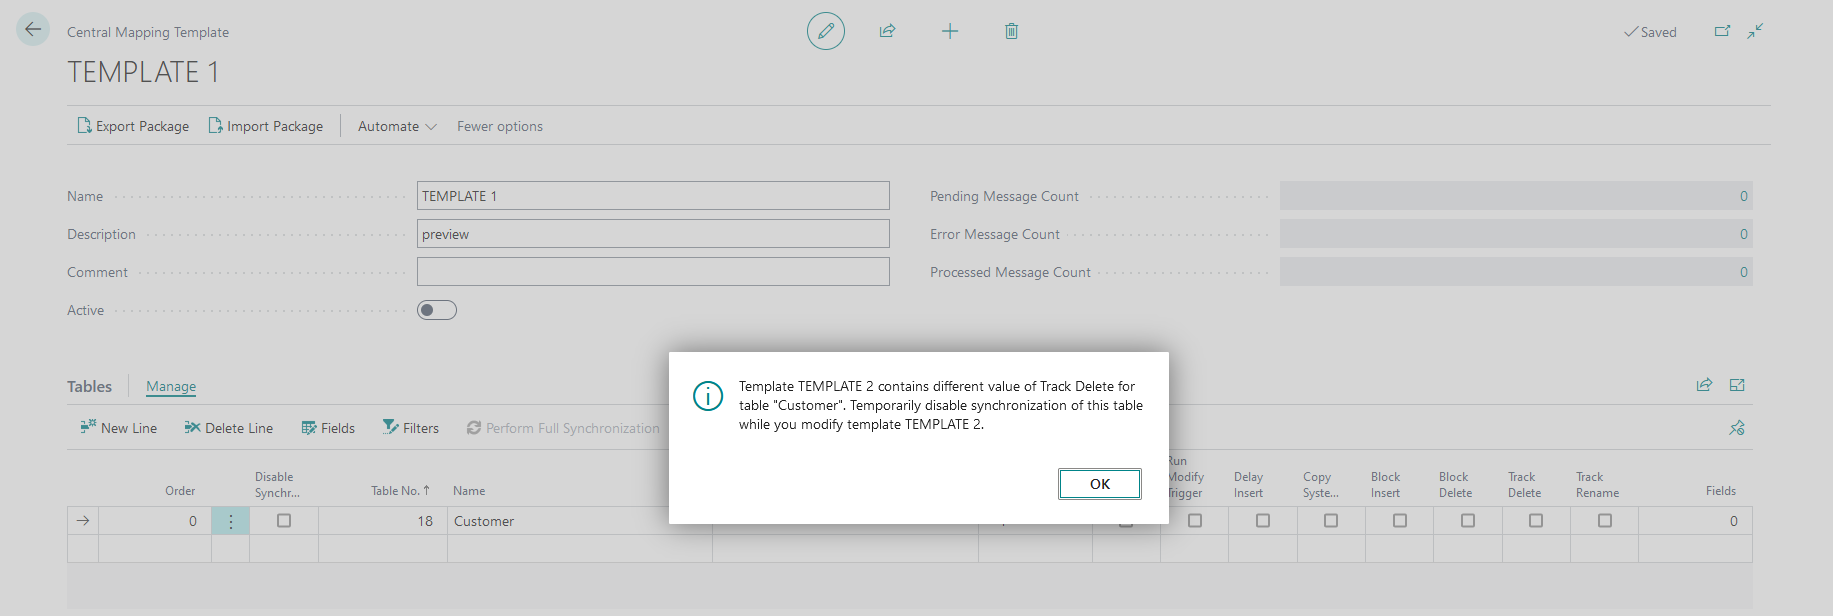
There are two options to resolve this.
-
Option A:
- Correct the values in current line.
-
Option B:
- Activate Disable Sync on current line.
- Correct the values in the existing line.
- Deactivate Disable Sync on current line.
Message status #
Sent messages #
On "Central Mapping Template List" page and in both the main section and Companies section of "Central Mapping Template" page there are the number of sent messages with Pending, Error and Processed status.
Clicking the number of messages opens the list of sent messages.
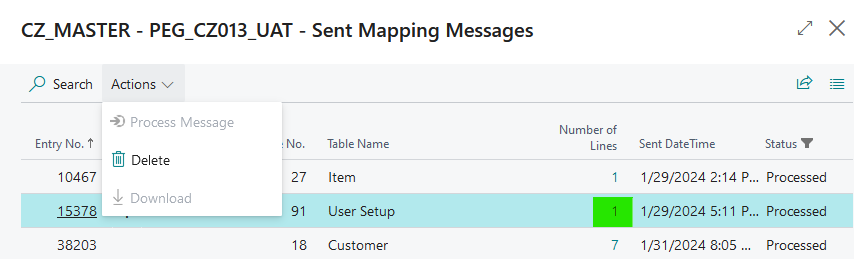
Any message can be deleted using Delete action. This will attempt to also delete the message in the target company.
On messages with Error status, actions Process Message and Download can be applied.
Process Message schedules the message again for processing in target company if attempts have been exhausted or an earlier erroneous message is blocking the processing of current message. This action can only be used if the message has been received by the target company. Since it bypasses the rule that all messages for given table should be successfully processed before processing a new message, this action should be used with caution.
Download allows the user to download the whole message in JSON format.
Further clicking the number of lines opens the list of lines within the message.
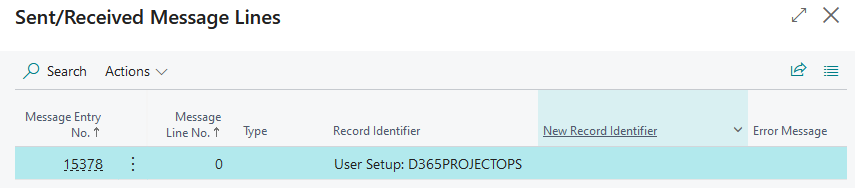
On this page it’s possible to download the message line in JSON format using the Download action.
Received messages #
In the target company the "Received Mapping Messages" page contains the list of received messages.

On messages with field Contains Error active, the action Process Message can be used to try processing the message again regardless of the Attempts Left.
Likewise, the action Resend Feedback can be used on messages with Feedback Failed active to try sending feedback to source company. If the source company successfully receives the feedback, the Type, Status and Error Message of the original sent message is updated. If all sent messages preceding the current message have status Processed, these messages will be deleted and Last Copy Datetime of the company will be updated to Sent DateTime of the current message.
Both Contains Error and Feedback Failed change which fields of the message can be edited. If neither is active, the only editable field is Attempts Left, which is by default set to 3 and is decreased by 1 with each processing attempt.
Processing of changes #
Changes in records of tables specified within templates can be automatically synchronized by adding a job queue entry for report Copy Data via Central Mapping (80024). When this report executes, it processes all Active templates.
Only the tables that do not have Disable Synchronization active are considered for the processing. When template is processed, the values of Block Insert and Block Delete are first sent to target companies for each table. Then the records in delete/rename log are sent to target companies if not already present. Finally the records of each table that have SystemModifiedAtNo later than both Last Copy Datetime and the Sent DateTime of the latest sent message and also match the filter are sent to target companies.
In case the sending is successful, a sent message will be listed in the source company and a received message will be listed in the target company. If the sending fails, the sent message will have Error status and a description of the error. This failed message cannot be processed again and must be manually deleted. If the sending is successful, but the processing fails in the target company, the sent message status will change to Error if the feedback succeeds. If the feedback fails, the sent message will appear to be stuck in Pending status and needs to be manually processed in the target company. A sent message can actually be in Pending status if a previous message for the same table is not processed yet, either because of an error or a feedback failure.
The action Perform Full Synchronization in Tables section of "Central Mapping Template" can be used to manually synchronize one table if the data are missing because of an error.